For over two years now this little wooden box has been knocking around the boys’ bedroom. In the run up to Christmas 2013 I bought it, filled with celemtines and had ear-marked it for a little project.
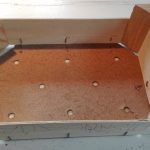
When I wasn’t paying attention Number One, then five years old,got his hands on it and began to use it for practicing his writing on it, starting with an attempt at my name. Well, I could hardly snatch it away and paint it then, could I.
Several times The Bavarian was tempted to throw it out whenever a major bedroom clean up was going on, but I stopped him. Whether out of sentimentality or selfish reaasons, no on will ever know!
Lately the boys haven’t used the box for anything and it was literally getting kicked about the place. I decided the time had come to finally bring my project to fruition – making a pretty little shelf for my hobby room.
What I used for this project:
A small wooden orange crate
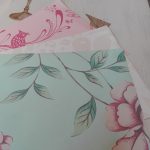
A wallpaper sample (when we moved into the house I went mad for wallpaper samples and have dozens now. I could’t bear to throw them out and they have come in handy for make-and-do afternoons)
White chalk paint
Paintbrush
Hammer
Nails
Spirit level
The first thing I did was dust off the box and paint it. It didn’t need any sanding.
When the paint dried, I applied a second layer. To be honest, the crate could have done with a thrid layer, but I didn’t want to cover up the writing completely when it came down to it.
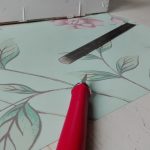
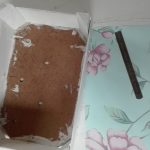
Using a scalpel, I cut the wallpaper to size so that it would fit snugly into the base of the crate. I just pressed it firmly into place. If you were making one, you might prefer to use wallpaper paste to stick it in place. That was my initial idea, but the wallpaper I used is quite stiff and sits well without being stuck. It also leaves me the option of replacing the wallpaper if I get bored of this one (I doubt I will though. I love the pink and turquoise combination.
Using a few small, thin nails, and with the aid of a spirit level, I mounted my new crate shelf on the wall of my hobby room. I’ve arranged some of my sewing bits and bobs on it, since it is mounted above the sewing maching we inherited from The Bavarian’s grandmother.







What I transformation! This is such a pretty project and the crate is perfect storage for nice sewing bits and bobs.
#HomeEtc
http://www.hellonancy.co.uk
Thanks Nancy! It was really quick and simple, but I love it.
I love what you have done here. Such a fab idea for a shelf and it looks so pretty too #HomeEtc
Thanks. It is small but a handy size for my threads and pin cushions. Plus I get to see one of my favourite wallpapers 🙂
What a super upcycle. A lovely way to display your sewing gear. Don’t worry about finishing your quilt, I think it looks cool as a wall hanging ( I have many unfinished sewing products waiting until I feel the urge;-) ) #homeetc
Thanks Louisa. Yes, I have my doubts about that quilt, especially since it didn’t get finished during any of my pregnancies. I am baby blanket crazy but somehow those patches never got further than being stitched into flowers 🙂
I think it matches really well with your patchwork flowers. You have done a fantastic job and it looks fab hanging on the wall #homeetc
Thank you Tracey. That is lovely to hear. x
What a clever idea! And you have to love woodchip wallpaper, don’t you 😉 #HomeEtc
Thanks. Let’s just say I hardly notice the woodchip anymore 🙂
YOU’VE GOT A NEW LOOK!!! VERY nice!!!!! Looks very fresh — love it 🙂 And also love the little orange crate! If you can’t have pastels and florals in your craft room then there’s something up with the world!! Love the patchwork flowers too — I think they make fab wall art!! 🙂 Thanks for linking up lovely #HomeEtc
I have! Nice of you to notice.
I’m getting lovely feedback on the patchwork. I may well leave them there permanently now 🙂
That is so sweet what a great idea, I love up-cycle projects x
Me too. I am addicted to it. I am a total hoarder and end up having loads of stuff to work with. It is great (at least I think so. My husband despairs of me sometimes).
Oh what is it about wood chip, our first house was literally covered in it too.
Ahhh!! I don’t blame you for not wanting to completely cover the writing, so sweet! That is a fabulous idea and looks gorgeous, the wallpaper is so pretty too. The patchwork does look great, maybe you could frame it to give it some protection from the sun because it is surely wall art now?!? Have a lovely weekend xx
Great idea Lisa! Because the patchwork was originally there as a temporary thing, framing it hadn’t occurred to me. But I think I might now.
Oh just lovely! And I love the new look blog!!!!!!!! All change 🙂 Thanks for linking up. Jess xx
#HomeEtc
Thank you Jess. I was dithering over the change for months and finally went for it. There are some glitches still but time will iron them out.
Ooh I love this, such a good idea for some upcycling. #HomeEtc x
It is a simple one, but effective. Thanks for popping by Caroline.
This looks like a lovely project I think its very sweet and can see why you dint want to get rid of it. I have an old sewing box like yours which my nan game to me 🙂 Thank you for joining us at #BloggerClubUK hope to see you again next week x
Thanks! Those sewing boxes are great. Mine came from the junk yard. I gave it a clean, then rubbed it with wood stain to even out the colour. After that I changed the handlles to freshen it up a bit.
That’s such a cute idea. I love the paper you’ve chosen, too. Those are the colours in my bedroom and they’re so restful x
They are gorgeous colours. I wanted that wallpaper in one of the rooms but sadly was vetoed by The Bavarian. So all I got was the sample. Still, it got put to good use.
Thanks for popping by Rachel.