Last week I wrote about the accessories I bought this summer for our upstairs bathroom. They gave me the kick I needed to get going on making some changes to the bathroom I was beginning to hate.
Just a few short weeks after beginning the makeover, I love my bathroom. Several small changes were all it took to give the room a brighter, fresher look.
The Plan
While we weren’t working with a specific budget, we knew we didn’t want to spend a lot on the bathroom. At some stage it will need a new shower and then we can rip out all the tiling and give the room a proper renovation. But for now, the little changes here and there have made an ugly bathroom into a much nicer one.
In my last post about the bathroom I mentioned that the yellowing electric sockets, the ugly grey putty, the orange-ish wooden ceiling and the picture tiles were the areas I wanted to attack change or improve.
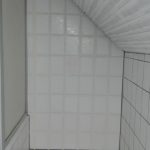
My plan for for a brighter bathroom with a subtle use of colour, as inspired by my purchases in Dunnes in Ireland in the Summer. The wooden ceiling was my main problem area – varnished, panelled and slanted, is was going to be a tough job. Not fancying sanding it, I decided to give it a few coats of Annie Sloan chalk paint in Old White and hope for the best.
The Big Cover Up
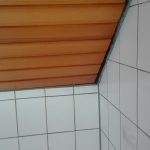
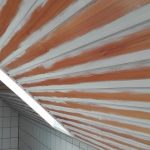
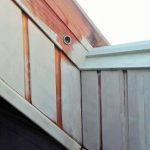
As you can see from the above photos, even the first few brushstrokes made a huge differnce. By the evening of the first day of painting, it seemed like we had no just pained but had inserted extra lights. Just two coats of paint and the room was transformed.
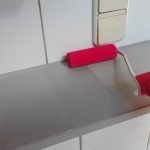
I was so pleased with how the chalk paint had gone on, I ordered Paris Grey and Duck Egg Blue, both from the Annie Sloan range and decided to give painting tiles and marble a go. After a few YouTube videos and blog tutorials on how best to approach painting these surfaces, I plucked up all my courage and started the jobs. I’ll do a separte post at some stage about how exactly I approached the painting. The results are great. I am really, really happy with how the bathroom has turned out. Even The Bavarian, who was skeptical about my plans at first, has had to admit that the bathroom is looking a damn sight better now than it was a month ago.
Kitting It Out
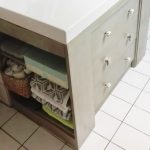
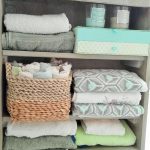
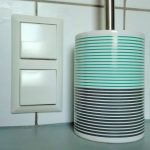
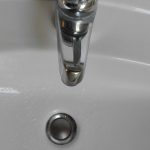
Several tins of paint later, our bathroom needed a bit of outfitting. The Bavarian put his self-taught carpentry skills to use and built us some sturdy shelves for storage and transformed a simple Ikea chest of drawers we had in the attic into a new under sink unit. This I painted in Annie Sloan Paris Grey and waxed with a combination of dark and clar soft wax, also by Annie Sloan. As well as that, we changed the tap on the sink and swapped the old electric sockets for sparkling new ones.
Once the whole room got a good dusting and wipe down, it was time to add in all my lovely accessories from Dunnes, Aldi, DM and T.K. Maxx. The bathroom had never, in the almost six years we have lived in this house, been colour-coordinated, organised or inviting, so I’m sure you can imagine my delight at seeing the final result.


The Cost
None of the changes were expensive. The total of the new accessories came to less than €60. The tap cost around €80 and the sockets approximately €20. The paint and the wood (for the shelves and under sink unit) were the biggest expense, coming to around €200 altogether. All in all, we spent under €400 on the bathroom and did all the work ourselves, except installing the new tap. Getting the plummer to do this cost us €12.90! He was at the house anyway to check our heating and did the job within a few minutes.

Since doing up the bathroom, I’ve noticed that instead of leavng the bathroom door closed all day, I tend to leave it open so that when I am going up or down the stairs I can catch a glimpse of the brightness and the organised look of it. I’ve taken a bit more pride in it too, cleaning it more often that I used to. Now that it looks good, I want to keep the bathroom looking its best.


This is brilliant, My sister has a bathroom clad in all of this ugly Pine, she won’t do a renovation as the house was built in the 70’s and she thinks it will end up being a huge Job, with plumbing and electrics, but a little makeover like this would be a good idea, I am going to send her your post for her to take some inspiration. #HomeEtc xx
She could well be right about it being a huge job to rip out an redo. But brightening it up with a lick of paint could do wonders for it. Pass it on and tell her to get in touch if she wants any more info from me.
Thanks for popping by!
Wow what a transformation!! I had no idea about tile painting, we have hideous tiles in the main bathroom so maybe this is something I could look into. Great job X #HomeEtc
Thanks Lins. I was always sceptical about tile painting, but it worked much better than I imagined it would. The chalk paint went on really well and so far it is flawless.
What a great job, it is amazing what some paint can really do isn’t it.
Looks so clean and fresh xx
It really is incredible how little is needed to make a big change.
What a fabulous update on a shoestring budget! I love the shelving unit – there’s something about seeing a nice stack of fluffy towels all lined up that appeals to me. I hate our bathroom and we’re planning on ripping it all out to redo it at some point in the (hopefully not too distant) future, but I’m now wondering if I could do a cheapy update in the meantime. #HomeEtc
Thanks Katy. I really enjoyed this project. It is so satisfying to see something ugly become something nice with a few brushstokes and some accessories.
This looks great! I love your colour scheme. We are in the process of renovating our bathroom too, but with lots of projects on the go at the same time it has taken a bit of a back seat!
#HomeEtc
Thanks Stacie. The colours really struck me when I saw them and that is what finally got me going on the renovation.
Good luck with your own renovations!
Ooh it looks so much better, our bathroom is in the eaves and I have been wondering what to do with that corner when we change our bathroom and I am thinking I need shelves just like that x
The shelves are proving a great solution for an otherwise dead corner. I hope they work well for you too.
Fab carpentry job, and what a bargain plumber! It all looks fab (and made me miss my shopping trips to Dunnes on visits home, need to plan one soon!) #HomeEtc
I’ll pass your praise on to my live-in carpenter 😀
Dunnes ships internationally now. Check them out.
Love the changes you’ve made! Orange pine definitely doesn’t belong in a bathroom – the white looks so much nicer. I’m glad your tile painting went well – I’m really pleased with how mine turned out and it seems to be lasting well too. I really like your storage unit too. x #HomeEtc
Thanks Lizzie. I’m very glad to be rid of the orange.
That is amazing!!!! What a difference — WHAT was the deal with orange pine cladding?? It looks so much better painted doesn’t it? Looks like a totally different room Fionnu — well done to the Bavarian for the shelves too — great job!! 🙂 Caro xx #HomeEtc
Thanks Caro. The previous owners here had half the house class in panelling of one type or another, who knows why. We are dealing with it but by bit.
Sometimes the biggest transformations are the simple details that you look at every day and think “i don’t like this”. The all-white looks so much more fresh and open. Great job!
#HomeEtc
That’s true Karen. Thanks for popping over.
Awesome!
Thanks!
Awesome makeover!
Thanks!
Merry Christmas!