I’m not really one for motivation quotes. I can see the appeal of them, but they are not something I really feel the need to surround myself with. There are some I like a lot, but it is enough for me to have them in my mind.
Create a life you love
This too will pass
You must do the thing you think you cannot
However, in a spot of creative pottering with wood, glue and paper the other day, I ended up making a quite pretty piece of artwork. When it was finished, I felt it was missing something. I slept on it for a night or two before deciding that some text would complete it.

None of the quotes which have a special place in my mind seemed to suit the pattern. I wanted something apt to the art and to my home.
Aim
for a
beautifully
happy
life
That is what I came up with in the end. We can’t always get what we want in life, but we can aim for what we want. We can strive for a happier life, a more beautiful life.

Here is how I went about creating my artwork.

What you’ll need for the base artwork:
Wood (I used floorboards)
Decoupage glue
Paper napkins and thin paper such as origami paper or wrapping paper
A soft paintbrush
A scissors (optional: scalpel)
A soft cloth
Fine sandpaper, optional
What you’ll need for the quote:
A computer
A laser printer
Acrylic transfer medium
Thin printer paper
- Begin with the wood. As I say, I used a few pieces of old , solid wood tongue and groove boards. You can use any wood, old or new. Decide on the size you want and cut the wood to size or, if buying new, ask your DIY shop to cut it for you.
- Using a soft cloth, dust off the wood to make sure you have a clean surface for your glue.

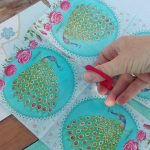
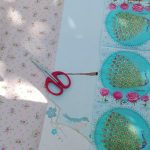
- Lay out your paper and napkins and decide on the order of the paper. I played around with mine for a few minutes before making my final decision. Then cut your paper to size, leaving a little extra on all sides. You can trim this off later.
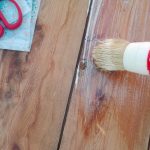
- Brush glue over the area you are attaching the first strip of paper to. Press the paper down onto the glue very carefully in order to avoid trapping air underneath. Rub gentlty across the dry side of the paper with the soft cloth or a plastic paper folder with rounded edges. Then carefully trim the edges with a scissors or scalpel.
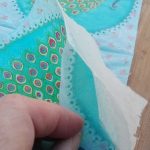
- If using paper napkins, unfold the napkin and remove the top layer. This is the one with the pattern. It will be very thin and delicate, so be especially careful when laying it down onto the glue.
- Repeat with the glue and paper until you have all of your wooden surface covered.
- Leave to dry for several hours, preferably overnight.


- To lend your paper a more worn look, you can go over it with fine sandpaper, applying more pressure to some areas or even ripping off a little here and there. Wipe away all the dust and paper scraps with a soft cloth.
- To make your transfer, decide on the text and font you want to use. Then flip the text so that it is backwards. Print it on thin printer paper with a laser printer. (Feel free to use my printable, above).
- Cut out the text and arrange it on the artwork in the correct order.


- Using a soft paintbrush and the transfer medium, apply the transfer medium liberally to the area you want your text to be. Then place the printed paper text side down onto the transfer medium. Press well and leave to dry for 24 hours.
- Using a damp, soft cloth, dampen the paper with the text. Using your fingers, rub off the damp paper. The text should remain on the artwork.
You very own motivational quote is ready to hang up and brighten your day every time you look at it. I have placed mine in my craft alcove in the guest room, as a message to myself and anyone who is staying with us.



That is a stunning piece Fionnuala. You are wonderfully creative 🙂
*blushing* Thanks Nicola. It took a while but there was nothing difficult. I bet you and / your eldest daughter would enjoy trying it out.
Wow that looks so fab, what a great project and one I would enjoy doing x
Thanks. I had a great time making it.
This is just gorgeous! I love it, you are such a creative soul 🙂 #HomeEtc
Oh thank you Julia. It brightens my day whenever I see it perched in my craft corner.
Wow, what a clever idea and the effect is stunning. So effective 🙂 #HomeEtc
Thank you! It was a bit of a spontaneous craft session but I was pleased with the result.
It looks so pretty and a lovely quote (which I wholeheartedly agree with!) too X #HomeEtc
Thank you Lins!
I like this quote! Great words to live by 🙂
#HomeEtc
Thanks Karen.
That is so creative! I love the idea and you have really made it your own. Great to see the step by step instructions 🙂 #homeetc
Thanks! I enjoyed making it.
Aaah you clever thing!! SUCH a fantastic make — great tutorial too — thanks so much for sharing! I’ve been meaning to make some new artwork for so long — there just aren’t enough hours in the day at the moment though!! Am inspired! 🙂 #HomeEtc
Thanks Caro. I know what you mean. Time flies and it can be so hard to make the time for a bit of creativity.
Beautiful, I love this! It looks really effective 🙂 Clever lady! Jess xx
#HomeEtc
Thank you Jess! It was fun to make.
I love this! Thanks for sharing!
Thank you Eri.
Your welcome! 🙂